


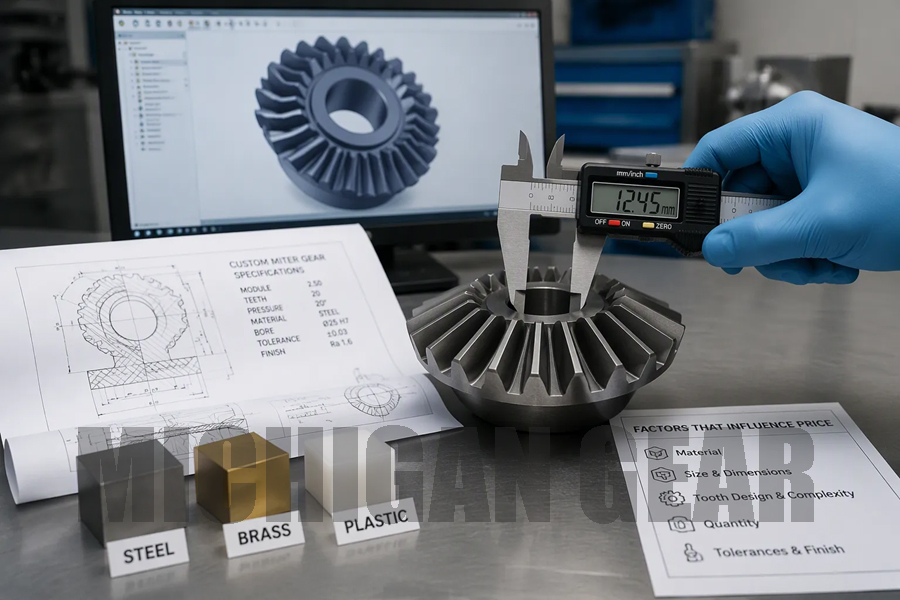
A custom miter gear typically costs between $50 and over $500 per unit. Material, tolerances, and order quantity drive most of that spread. I see buyers surprised by quotes that vary this widely for what looks like the same part.
A miter gear transmits motion at 90 degrees without changing speed. Custom orders add variables that standard catalog parts avoid.
Seven factors shape the final price: material selection, standard versus custom sizing, tolerances and precision, surface finish, heat treatment, order quantity, and design optimization. Each one moves the number up or down. I will walk through all seven so you can spot where your project spends money.
Key Takeaways
●Material choice can change the cost by 2 to 5 times. Choose the right material for your application.
●Tight tolerances above AGMA class 10 add 20-50% cost. Only use tight tolerances where needed.
●Ordering more gears at once lowers the price per gear. Batch sizes of 25 or more save money.
●Design changes like using standard sizes or simplifying features can cut 10-20% from the cost.
●Heat treatment and surface finish add extra cost. Only apply them when the gear needs them.
Material Selection
I start every custom gear project with material. The material alone swings the final price by 2 to 5 times. Cheap materials like acetal cost pennies per pound. High-end alloys like 8620 steel cost much more. But raw material is only part of the story. The material also drives machining time, tool wear, and heat treatment needs. A hard-to-cut material adds labor hours to every piece.
Raw Material Cost Impact
Raw material cost sets the floor for pricing. An acetal blank costs a fraction of a stainless steel blank at the same size. That difference grows fast with larger diameters. Material cost is just the start. I also watch how the material behaves under the cutter. Softer materials like brass cut fast with low tool wear. Harder materials like 4140 steel slow down cutting and wear tools faster. Every extra machining minute adds cost.
High-strength applications need heat-treatable steels. These materials cost more per pound and take longer to machine. A cheaper material might seem smart until you face extra machining time or early failure. The material choice affects every downstream step.
Common Materials and Their Trade-Offs
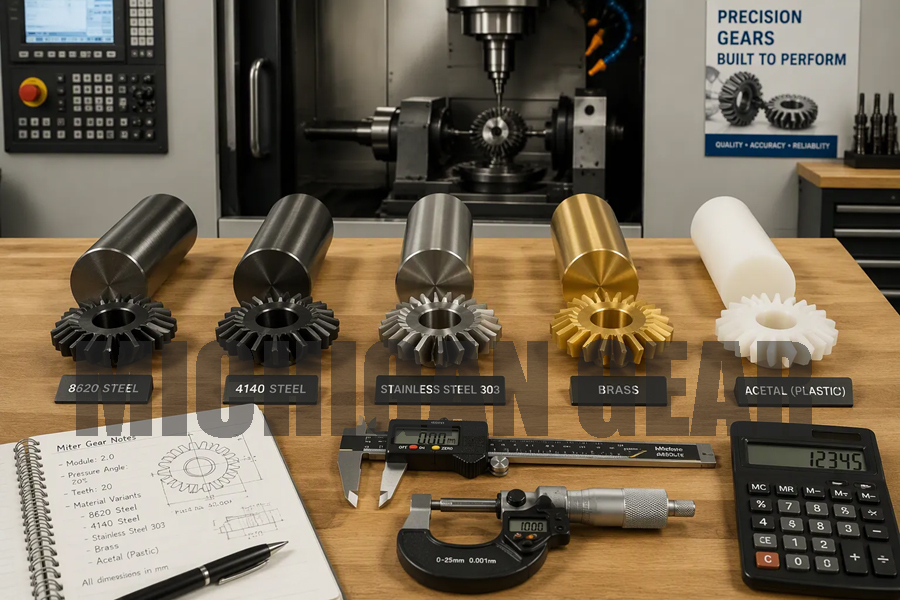
I work with five common materials. 8620 steel is my top choice for high-strength custom Miter Gear applications. It carburizes well and gives excellent wear resistance. 4140 steel offers good strength at a lower cost. It works for through-hardened parts. Stainless 303 and 316 resist corrosion but cost more. I use these for food processing or marine gear. Brass machines quickly and resists corrosion for light loads. Acetal gives the lowest cost with decent strength for low-duty cycles.
Every material has a trade-off. 8620 delivers the best durability at the highest cost. Acetal saves money but fails under heavy load. I match the material to real application demands. Relaxing a non-critical spec often lets you use a cheaper material. I recommend consulting manufacturers like MichiganMechanical early in design. They can suggest options that balance cost and performance.
Standard vs. Custom Miter Gear Sizing
Sizing decisions often separate a budget-friendly order from an expensive one. Standard sizes exist because manufacturers already own the tooling. Custom sizes force new tooling and setup work. That difference shows up directly in your quote.
Cost Savings with Standard Sizes
Standard pitch and module gears avoid tooling costs entirely. The cutters, hobs, and fixtures already sit on the shop floor. I pay nothing extra for setup because the machine runs these parts every week. A standard gear also ships faster. No one waits for a new cutter to arrive or a fixture to be built.
I always check the standard catalog first. Many buyers assume their application needs a custom size when a stock gear works fine. A standard gear with the right tooth count, pitch, and pressure angle often costs a fraction of a custom part. The savings can reach hundreds of dollars on a single order.
When Custom Dimensions Justify the Premium
Custom sizes make sense when no standard gear fits. Non-standard pressure angles, unusual tooth counts, or odd shaft angles all require new tooling and setup. That work adds 15-30% to the per-unit price. The premium covers design time, cutter fabrication, and test runs.
One rule governs every miter gear pair. Only gears with the same teeth, pitch, and pressure angle mesh correctly. I cannot mix a standard gear with a custom one and expect smooth motion. Both gears in a pair must match. That fact sometimes forces a custom order even when one gear could be standard.
I ask a simple question before approving custom sizing. Does the application truly need the non-standard dimension? If a slight design change allows a standard size, I take it. The savings usually outweigh the small performance difference.
Tolerances and Precision
Tolerance specs decide how much time a shop spends on your part. Tight tolerances demand extra machining passes, more inspection, and sometimes specialized equipment. I have seen a single tolerance callout double the price of a Miter Gear order. The AGMA class system gives buyers a clear way to set precision levels. A loose tolerance saves money. A tight one buys performance. The trick is knowing where each one belongs.
Impact of Tight Tolerances
AGMA class 8-10 covers most general industrial use. These classes give smooth motion and reasonable life for standard drives. Shops produce them with normal hobbing and standard inspection. The cost stays predictable. I quote these classes every week.
Class 12 and above changes the equation. These classes add 20-50% to the per-unit price. The jump comes from extra machining time, finer cutters, and more inspection steps. A shop may need to grind teeth after hobbing. Each additional operation adds labor and machine time. I treat class 12 as a tipping point. Below it, costs rise gently. Above it, costs climb fast. I warn buyers about this jump early. A small design change can drop the part back to class 10.
Cost-Effective Tolerance Classes
I match the tolerance class to the real demand of the application. A slow-turning drive with light loads rarely needs class 12. Class 8 or 9 delivers long life at a lower price. High-speed or high-load applications justify the tighter class. The extra precision reduces vibration and wear. I ask about speed, load, and duty cycle before I pick a class.
Buyers should define tolerances only where they matter. A tight bore tolerance may be critical. A tight tolerance on a non-contact face usually is not. I review every callout on the drawing and ask one question. Does this dimension affect fit, motion, or life? If not, I relax it. That step alone can cut 10-20% from a quote. The savings can reach hundreds of dollars on a batch. The part still performs well because the critical dimensions stay tight.
Surface Finish Requirements
Surface finish specs tell a shop how smooth the final part must be. A smooth surface reduces friction and wear. It also raises the price. I treat surface finish as a precision decision, not a default setting. Every finish callout adds machining time. The right callout improves performance. The wrong one wastes money.
Surface Roughness and Secondary Operations
Standard machining leaves a surface roughness around 125 Ra or higher. That finish works fine for most non-contact faces. A finish below 16 Ra changes the process. The shop must grind or lap the part after cutting. These secondary operations add 10-30% to the per-unit price. They also add lead time. A ground surface demands a skilled operator and a slower feed rate. I see this cost jump most often on tooth flanks and bores. Those areas carry the load. A smooth finish there reduces friction and extends gear life. A smooth finish on a mounting face rarely helps. The part still bolts down the same way.
Avoiding Unnecessary Finish Specs
I review every finish callout on a drawing before I quote a Miter Gear. Many buyers copy a tight finish spec from an old project. They apply it to every surface out of habit. That habit costs money. I ask one question for each callout. Does this surface touch another moving part? If yes, a tight finish may earn its cost. If no, I relax the spec. A relaxed finish often drops the part back to standard machining. That change alone can cut 10-30% from the quote. I focus tight finishes near contact areas only. Tooth flanks, bearing journals, and sealing surfaces deserve the extra work. Housing faces and clearance bores do not. Buyers should mark critical surfaces on the drawing. That step lets the shop apply tight finishes only where they matter. The part performs the same. The price drops.
Heat Treatment Processes
Heat treatment changes the hardness and wear resistance of a custom Miter Gear. It also changes the price. I treat this step as a durability decision with a direct cost impact. The process I choose depends on load, cycle count, and budget.
Through-Hardening vs. Case-Hardening
Through-hardening heats the entire part to a uniform hardness. Case-hardening hardens only the outer layer while keeping a tough core. I compare these two processes on cost and performance.
| Heat Treatment Type | Complexity Level | Typical Cost per Gear | Performance Characteristics |
|---|---|---|---|
| Through-hardening | Simpler | $40–$60 | Uniform hardness, adequate wear resistance for most precision applications, handles moderate loads reliably |
| Case hardening | More complex | $120–$180 | Hard surface layer with tough core, extends wear life in high-cycle applications, justified for continuous operation above moderate loads |
Simpler heat treatment can cost roughly one-third of complex case hardening. It still meets the needs of most precision applications like servo drives, positioning systems, and instrumentation.
Distortion is another factor. Many large gears use flame hardening, nitriding, or through-hardening at around 300 BHN with medium carbon alloy steels such as 4140. This approach avoids the higher distortions linked to carburizing. Case-hardened 4140 steel reaches a surface hardness of 50–60 HRC with minimal distortion from rapid, localized heating.
Balancing Durability and Cost
I look for the best cost-performance balance on every project. Induction hardening works well for moderate loads, budget constraints, or prototype quantities. It provides adequate strengthening without the complexity and cost of carburizing. General industrial gearboxes and prototype gears benefit most from this approach.
For moderate-duty gears in medium quantities of 25–100 parts, induction hardening offers the best balance. It delivers up to 25% cost savings compared to conventional carburizing while still providing hard, wear-resistant surfaces. Budget-sensitive projects with moderate loads avoid the long cycle times of carburizing or nitriding.
Heat treatment and surface coating add $20–$100 per part depending on complexity. I always ask one question before specifying a process. Does the application truly need maximum wear resistance? If not, a simpler process saves money without sacrificing performance.
Order Quantity and Batch Size
Order quantity changes the price of every custom Miter Gear more than most buyers expect. A shop charges for setup once, no matter how many parts run. That fixed cost spreads across the whole batch. A small order carries the full weight. A large order shares it.
Setup Costs and Per-Unit Price
Setup and tooling usually cost $200 to $500 as a flat fee. This covers machine programming, fixture mounting, and first-article checks. The shop pays this cost before the first good part comes off the machine. On a run of 10 gears, that fee adds $20 to $50 to each unit. On a run of 100 gears, the same fee adds only $2 to $5 per unit. The part does not change. The math does.
I show this breakdown to every buyer who questions a high quote. The per-unit price often looks steep on small runs for one simple reason. The setup fee hides inside it. Buyers who plan ahead order in batches that absorb this cost. Buyers who order one or two pieces pay a premium for the same work.
Economical Batch Sizes for Custom Miter Gears
Minimum order quantities of 10 to 25 pieces are common in this industry. Shops set these floors to cover setup and keep the work profitable. I treat 25 pieces as the first real price break. At higher volumes, the per-unit price can drop 30% to 50% compared to a small run. The savings come from amortized setup, faster cycle times, and bulk material purchases.
I advise buyers to forecast their annual need before placing an order. A single batch of 50 often costs less than five separate orders of 10. The parts store well, and the price stays locked. One caution applies here. Custom gears tie up money in inventory. I balance the volume discount against carrying cost and shelf life. The best batch size covers real demand without leaving dead stock on the shelf.
Design Optimization for Miter Gears
Design choices made early in a project often decide the final price more than any negotiation later. I review every drawing for features that add machining time without adding real value. A few small changes can cut cost by 10-20% without hurting performance.
Simplifying Geometry to Reduce Machining
Every extra feature on a gear adds a step to the machining process. A keyway requires a broaching operation. A special bore needs a separate turning setup. A complex tooth profile forces custom cutter work. Each step adds labor, machine time, and inspection. I add up these steps before I quote a part. The total often surprises buyers.
I look for features the application does not truly need. A simple round bore with a set screw often replaces a keyed bore at a lower cost. A standard tooth profile works for most drives. I ask one question for each feature. Does this detail change how the gear performs? If the answer is no, I remove it. The part still works. The price drops.
Applying Design for Manufacturability (DFM)
DFM means designing a part so a shop can make it efficiently. I apply this approach to every custom Miter Gear project. I start by reviewing the drawing with the shop before cutting metal. This early talk catches problems while changes stay cheap.
Modular design helps here. A shared hub with interchangeable gear blanks reduces tooling across a product line. I also relax specs on non-critical surfaces. A loose tolerance on a mounting face costs nothing in performance. A tight one adds machining time. I mark critical dimensions clearly on the drawing. That step lets the shop focus effort where it matters. Buyers who bring a drawing early get the best results. I can suggest changes that save money before the design locks in.
Seven factors shape the price of a custom Miter Gear. Material, tolerances, and order quantity move the number most. Material alone can swing cost by 2 to 5 times. Tight tolerances above AGMA class 10 add 20-50%. Small batches carry setup fees of $200 to $500. Surface finish, heat treatment, sizing, and design choices fill out the rest.
I urge you to send a detailed drawing when you request a quote. Talk with the manufacturer early. Ask about relaxing non-critical tolerances or switching to a standard size. These steps often cut 10-20% from the price.
Use the manufacturer’s design-for-cost checklist before you finalize any drawing.
FAQ
What is the typical cost range for a custom Miter Gear?
A custom Miter Gear usually costs between $50 and over $500 per unit. Material, tolerances, and order quantity drive most of that spread. Small batches with tight specs land at the high end. Standard sizes with relaxed tolerances sit near the bottom.
Which factor affects pricing the most?
Material choice swings cost by 2 to 5 times. Tight tolerances above AGMA class 10 add 20-50%. Small batches carry setup fees of $200 to $500. I rank material, tolerances, and quantity as the top three levers on any quote.
How can I reduce the cost of my custom gear order?
I suggest three steps. Switch to a standard size when possible. Relax tolerances on non-critical surfaces. Order in batches of 25 or more to amortize setup. These changes often cut 10-20% from the price without hurting performance.
What should I include when requesting a quote?
Send a detailed drawing with critical dimensions marked. Note load, speed, and duty cycle. Ask about standard sizes and relaxed tolerances early. I find that buyers who share this information get faster quotes and better pricing.
Post time: Sep-28-2026